Make sure someone in your group has experience with the following:
- Ocean current basics
- Swimming and rip currents
- Local beach knowledge and etiquette
- Tying knots
- Boating safety (ES) and signals
- Kayaking
- Whistle and paddle signals
Instructions
1. Determine what area you would like to monitor.
- Location – If it’s your first time, try to find a calm beach where the water isn’t too deep, so that it’s easy to reach the buoy if you need to.
- Planning – Make sure you have enough time in your schedule, and bring a friend along. Sometimes currents are slow so it’s always good to have someone to share the beach vibes with. You’ll also need to decide if you’re going to take a boat or monitor from shore.
- Training – Consult with our team in advance so that we can arrange a training session for you to make sure you’re familiar with the equipment.
2. Gather your equipment.
- Science stuff
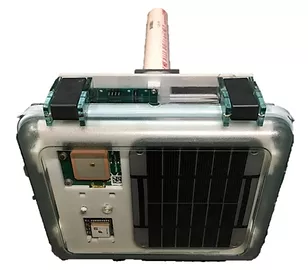
- Maker Buoy
- Spool of 20 lb fishing line (at least 400 yards)
- Cell phone
- Reel or fishing rod
- Pen and paper
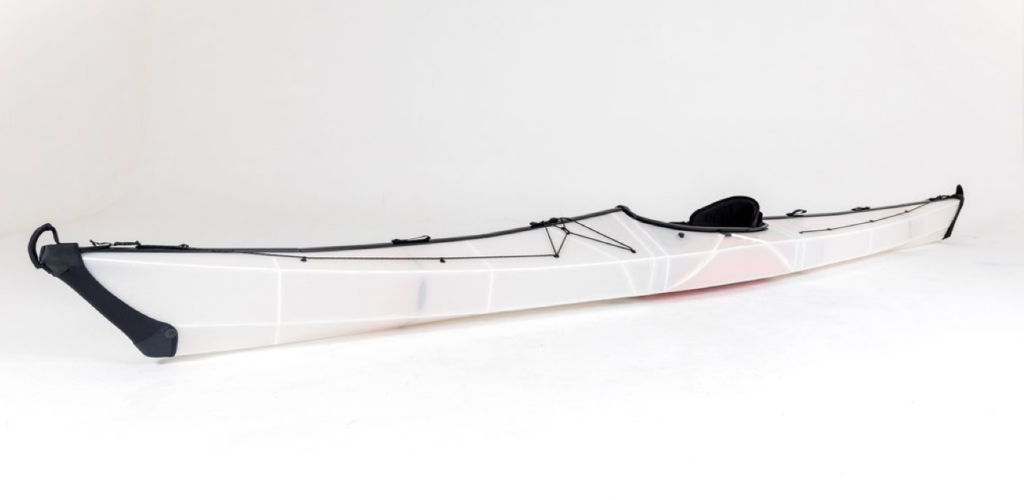
- Kayak and paddle
- Binoculars
- Beach stuff
- Hat
- Reef-safe sunscreen
- Sunglasses
- Swimsuit
- Water shoes
- Snorkel gear
- Drinking water
- Snacks
3. Send commands to the Maker Buoy.
- Wake up – At least 60 minutes before you want to start monitoring, use the magnetic dongle to wake up the Maker Buoy. You’ll need to hold it above the magnetic switch for about 30 seconds, after which you will see the blue light blink three times and then rapid short blinks. If it blinks three times and then a long blink, it means you put it to sleep, so you’ll need to repeat the process to wake it up.
New Maker Buoys come with magnetic switches and a “dongle” to change basic settings. Putting our @Prusa3D multi-material upgrade to good use. #3Dprinting pic.twitter.com/fnVgx1ULZ0
— Maker Buoy (@MakerBuoy) November 25, 2020
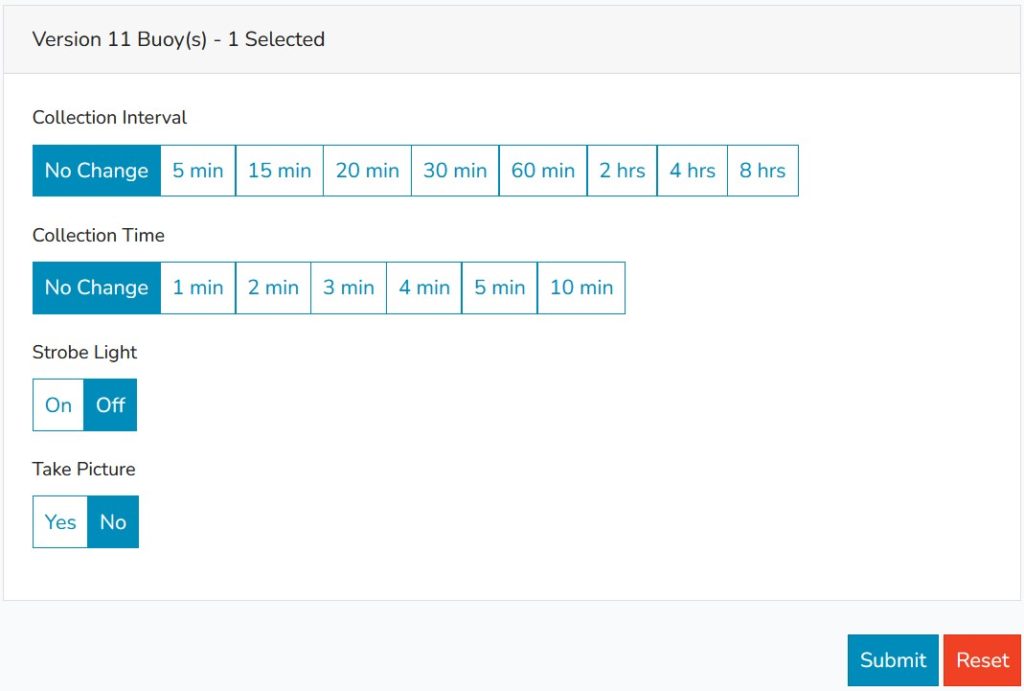
- Adjust intervals – By default, after waking the buoy it will take readings every 20 minutes, and send data after 3 readings (60 minutes). The buoy can drift pretty far in 20 minutes, so we want to change the measurement interval to 5 minutes to give us more details on the near-shore current. This will collect readings every 5 minutes and send an update after 15 minutes. To change this, we log in to the Maker Buoy online dashboard, click on the name of our buoy (MB-001) and scroll down to the command area. We set the Collection Interval to 5 minutes and Collection Time to 2 minutes, and click Submit at the bottom. The new setting will be uploaded to the buoy the next time it sends data, which is 60 minutes after wake it up. If you don’t send the command within those 60 minutes, you’ll have to wait another 60 minutes, so it’s good to send this command right after you wake it up.
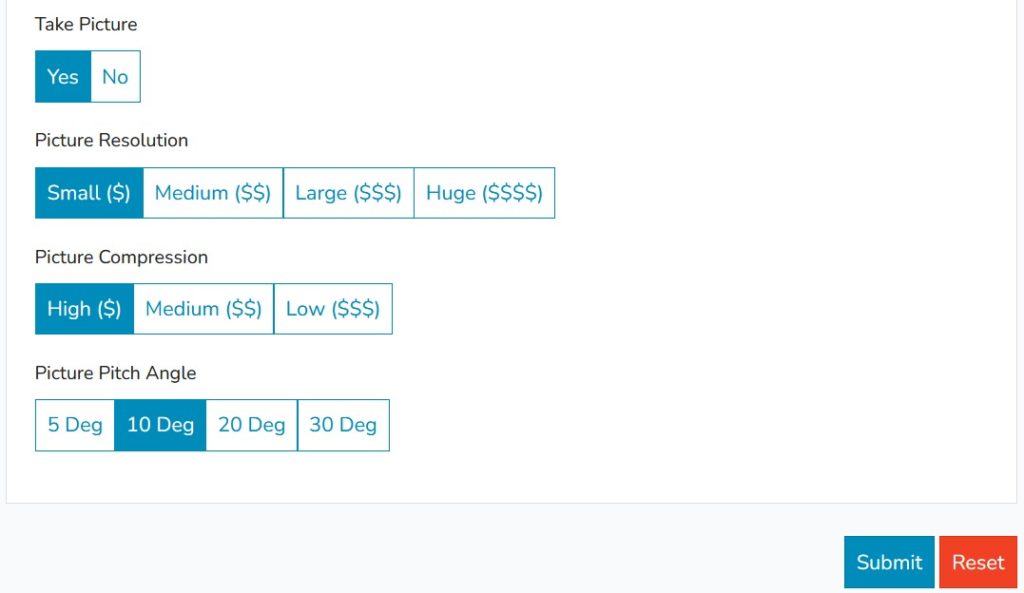
- Taking photos – If you want to take a photo with the buoy, if you’re mapping currents near some coral reef, for example, you’ll need to time it well. The photo command allows for different resolutions and compressions, and can be expensive and slow if you opt for the highest quality. The command to take a photo will trigger the next time the buoy uploads data, so every 15 minutes after we have done the above step, and it only takes one photo. The photo is uploaded through the satellite modem at the next data upload, after which another photo command can be sent. So the timing goes like this: Photo command -> 15 minutes -> photo taken -> 15 minutes -> photo upload -> buoy goes back into data collection mode.
4. Monitor from shore.
- Start – You’ll need to pick a spot to launch the buoy. Things to keep in mind:
- You’re going to be hanging out here for a while so get all of your stuff and find a comfortable place to stand or sit.
- To keep the line from getting caught, make sure you’re able to hold it above any rocks or branches that might be nearby.
- This is where the current map line will start, but where it ends up depends on the ocean.
- Notes – Write down which beach you’re at, describe it in your own words and make note of the date and time. Try to describe the structure of the coast, what shape the beach is, where there is sand, rock, etc. If you observe wildlife, fish or birds, write that down as well. Also note down when and where you launch the buoy, as well as when you woke it up so that you have an idea of when it will upload data.
- Knots – Tie the fishing line onto the buoy with a secure fishing knot. There are many options, but the clinch is a pretty secure and simple one to tie. The buoy has a hole going through the bottom stabilizer which you can thread the line through before you tie it.
- Launch – Place it in deep enough water that the bottom stabilizer doesn’t drag and breaking waves don’t knock it into shore.
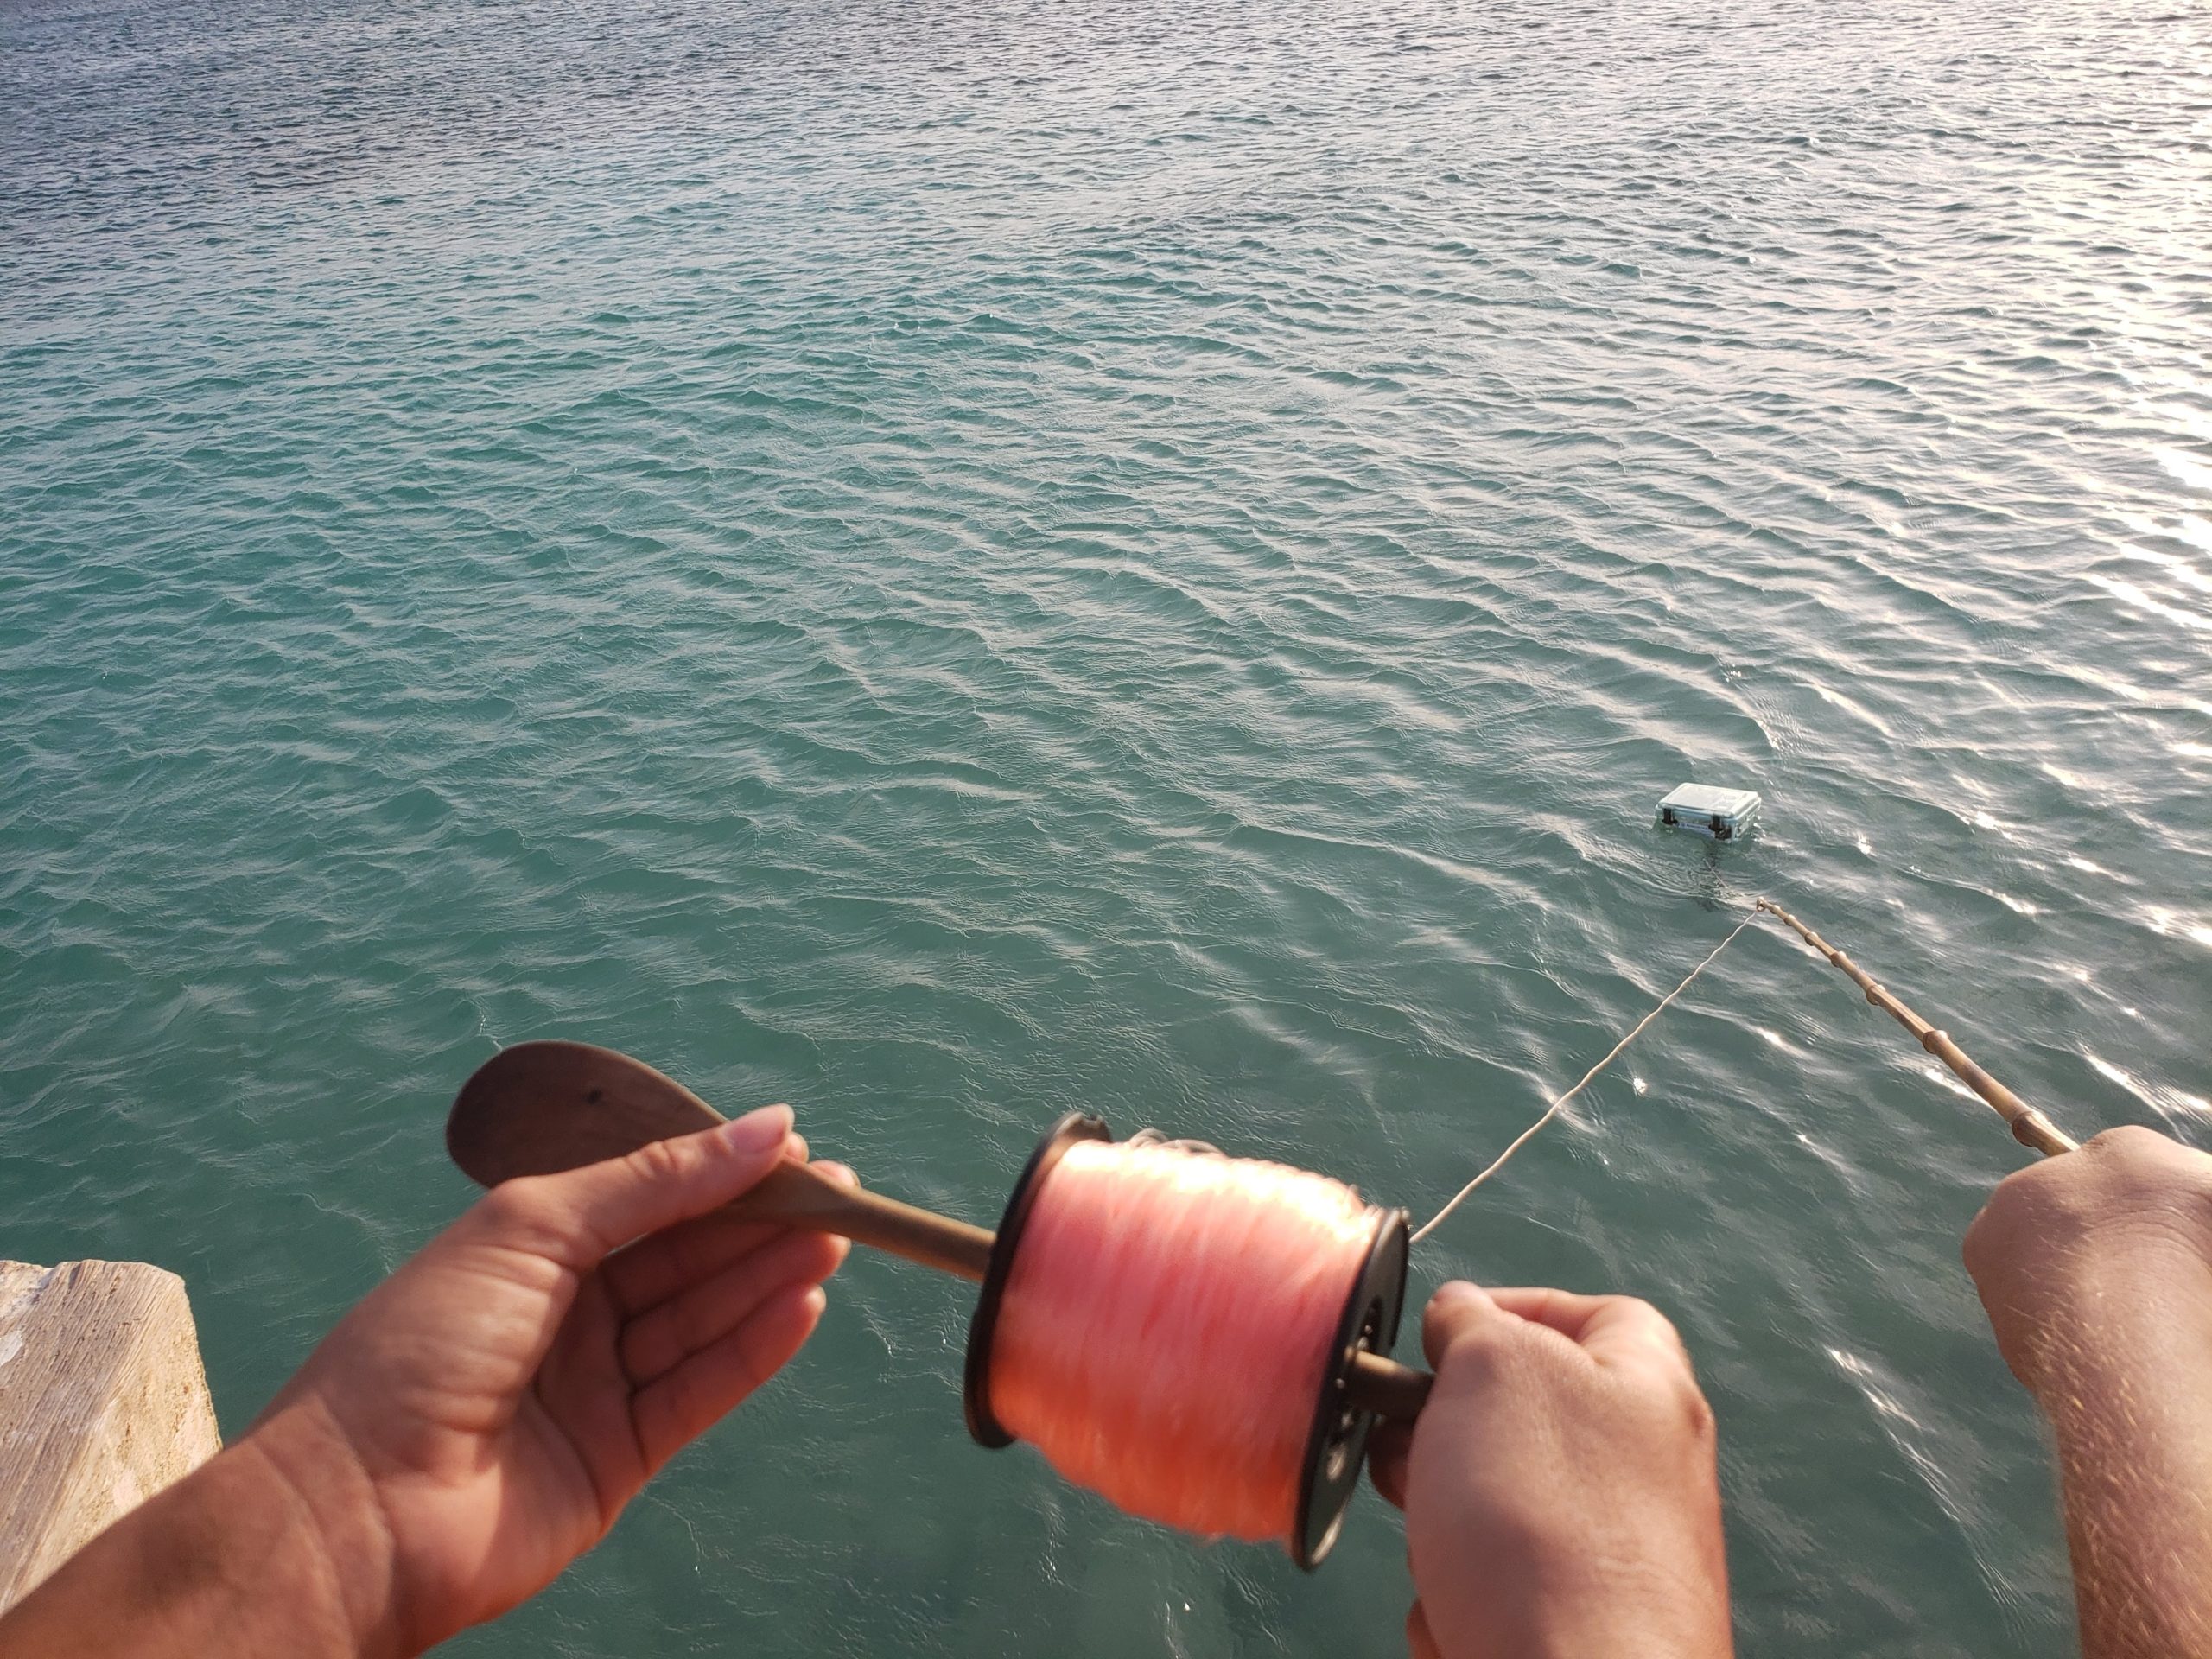
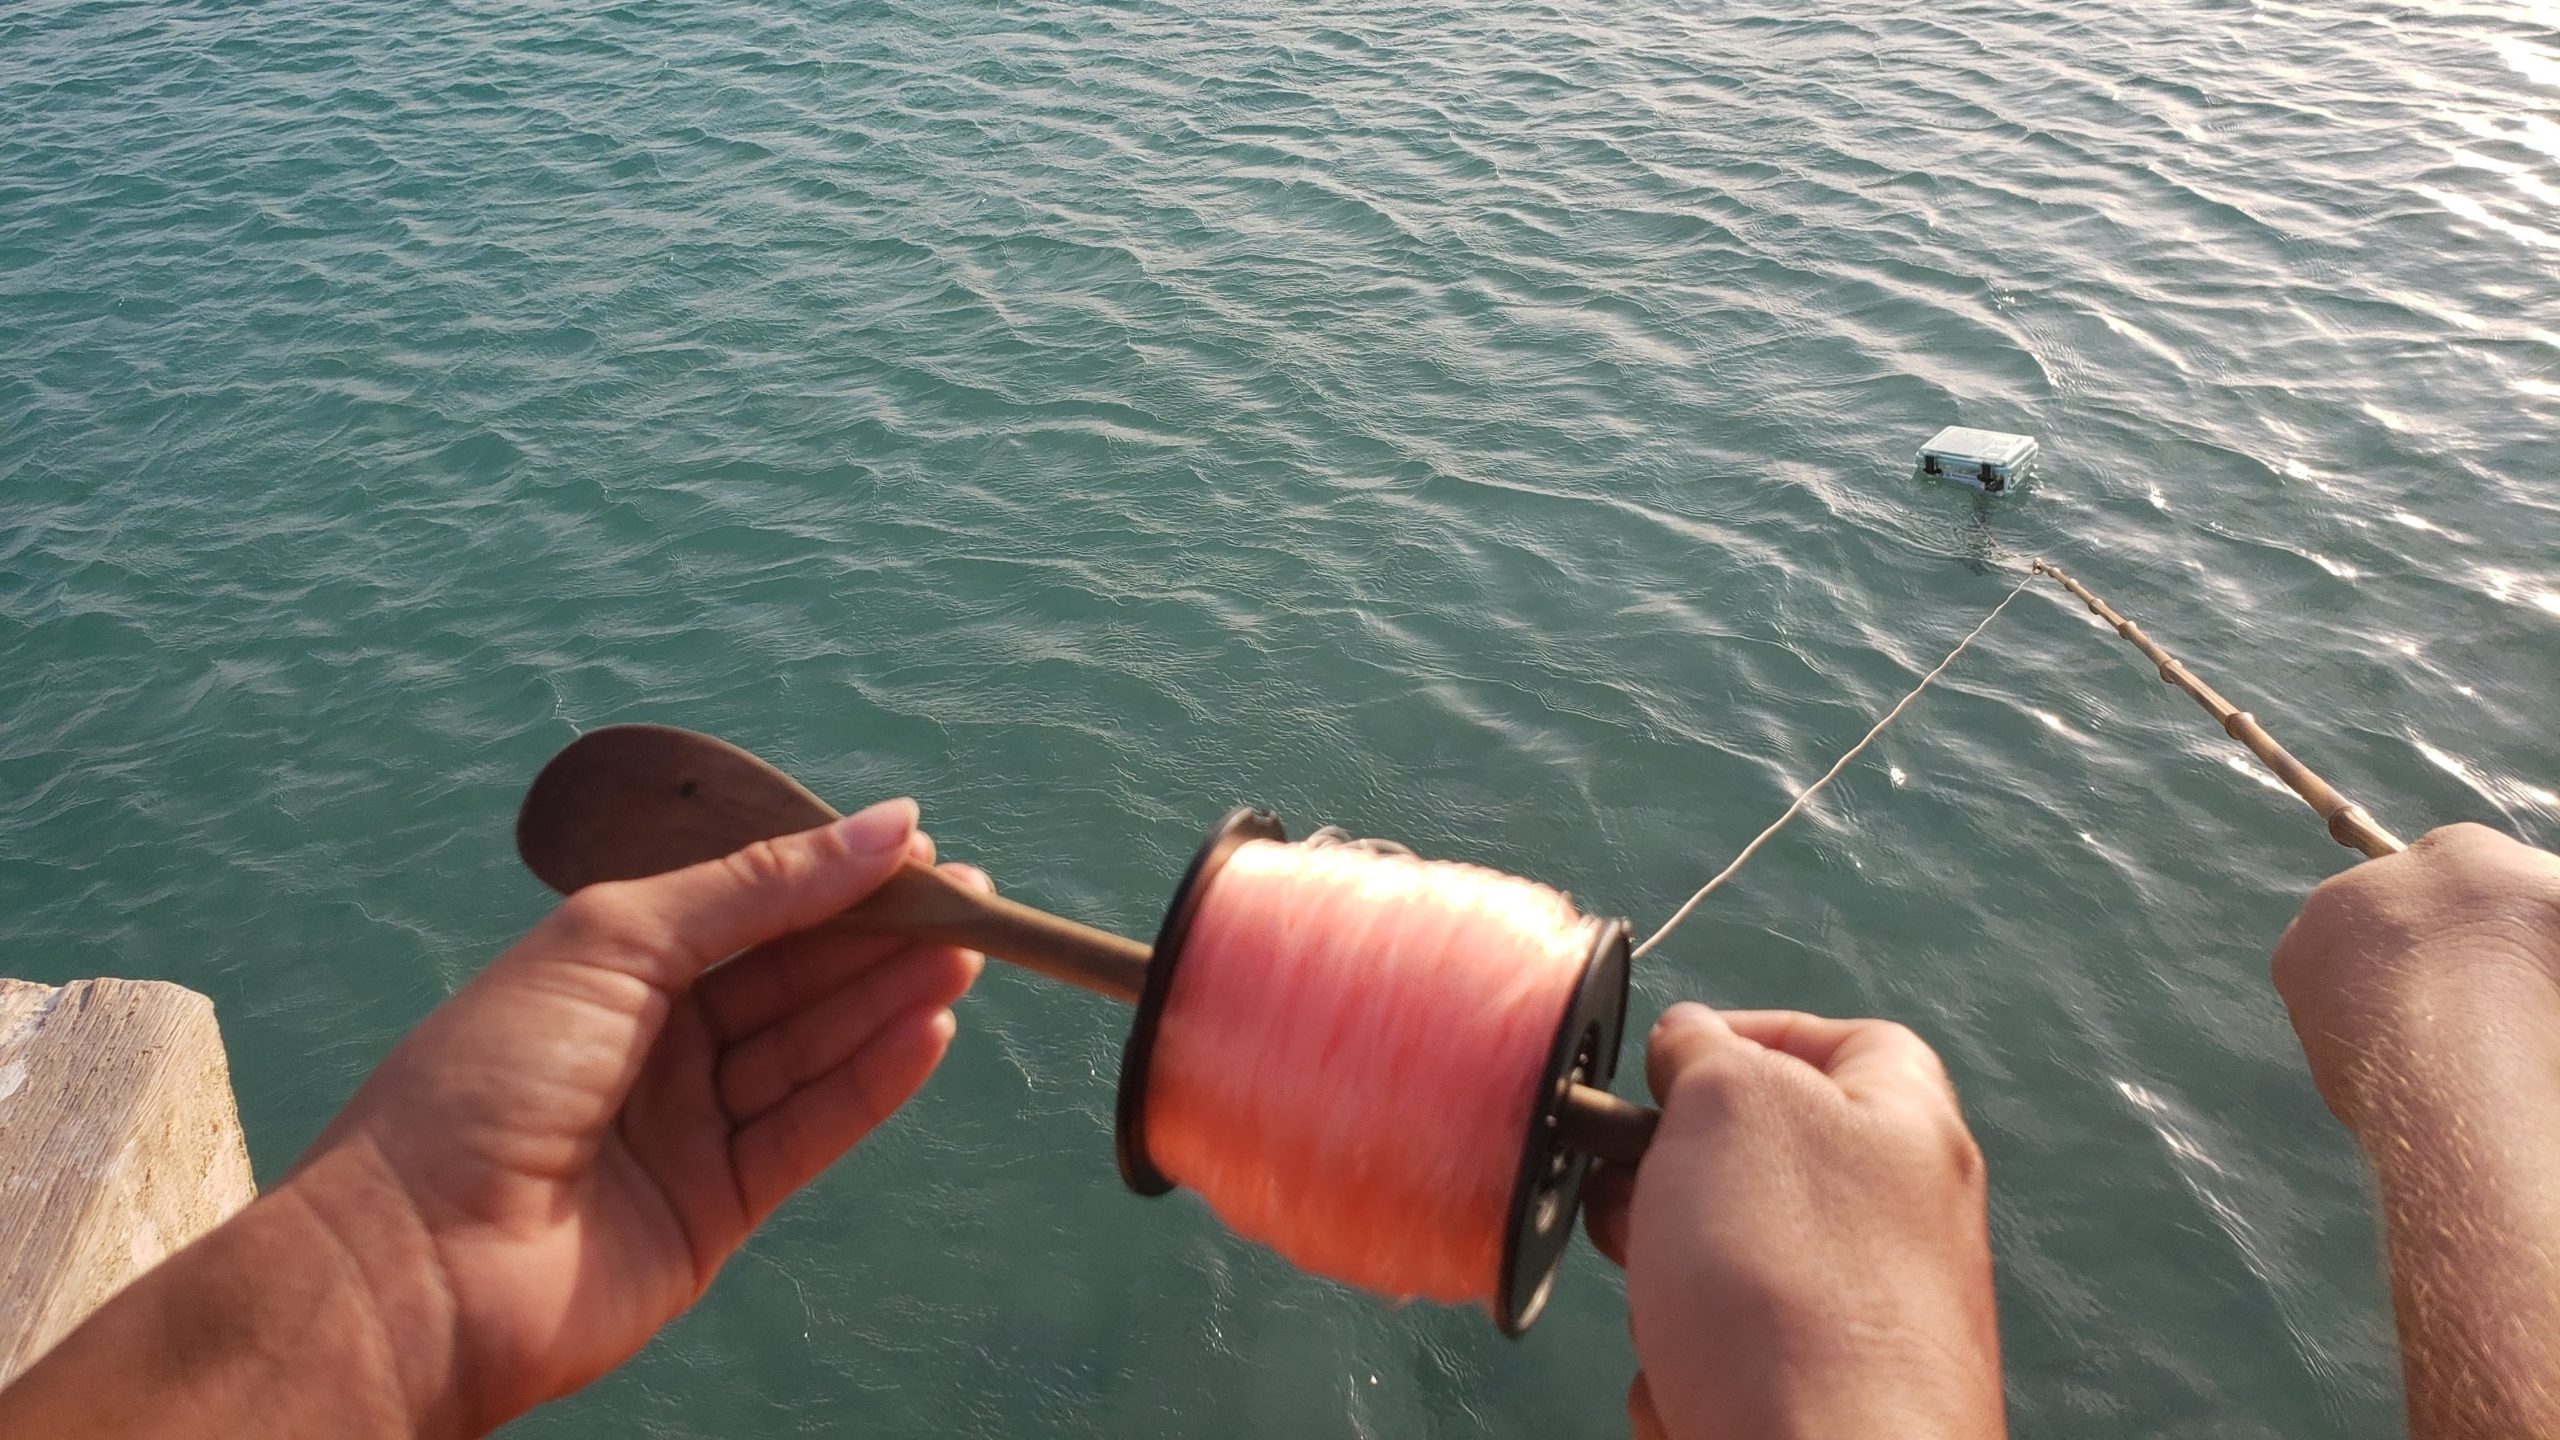
- Wait – Make sure you let the line out freely, so you don’t affect the buoy floating with the current. Other than that just make sure you pay enough attention to it that it doesn’t get lost or tangled or washed up on shore. If it does wash up, you might want to switch spots. If you see any boats or people fishing or swimming, make sure they’re not going to get tangled in your line. If you’re not sure, you can always reel it in and start again. While you wait you can also check the online dashboard to make sure that data is being uploaded, or to see pictures if you take any. Try to wait a multiple of 15 minutes before you reel it in, so that you minimize the data collected while you’re pulling it back.
- Repeat – It’s a good idea to get a few current lines to build a more detailed map. You can try multiple launches from the same place, and launch from different locations to see what works best. If you’re in a small bay, try to launch from at least 3 different locations to get a clear picture of how the currents move. If it’s a larger area, try more locations. If you’re on an open coast, you can repeat from the location that the previous drift ended up at, to create a continuous current line. It’s also interesting to test near streams or lagoons or other waterways that might have an effect on the current.
5. Monitor from the ocean.
- Safety – The most important difference if you’re going to be snorkeling or kayaking is safety. Make sure you wear a life vest, bring a whistle, and plenty of water. If you’re swimming, make sure you know what to do if you get caught in a rip current, wear fins so you can move quicker, and don’t stay out too long. And always, if you need to abandon the buoy for safety concerns, don’t worry, it will tell us where it is so we can retrieve it later.
- Observe – Make sure you don’t lose track of the buoy, but also be careful not to bump it. You’ll need to keep the right distance so that you can see it without affecting the current measurements. Your friend can keep an extra pair of eyes out, whether you are in a boat together, separate boats, one boat one snorkel, or even from shore.
- Repeat – If you’re in the water, you have a bit more flexibility in choosing your starting points. You also have the possibility of letting the buoy drift farther. Because of this you might decide that one long trip is better, or you can try to get more details in a smaller area by launching from different points. As mentioned in the Monitoring from shore section above, try to move it manually only after data is uploaded, and note the times when you launch it and retrieve it. This will help clarify which data points reflect the ocean current.
6. Take good care of everything.
- Equipment – The Maker Buoy is pretty robust, since it’s designed to be out on the open seas alone, but it should still be treated with care. Make sure not to drop it, rinse it with fresh water when you return from the beach, and inspect the silicone seal regularly for damage. If you notice any water inside, let us know immediately and try to store it in a position that the water stays in the bottom of the enclosure away from any electronics. On the software side, when you finish for the day, wait until the next data upload is complete (the blue light will be on while it is uploading), and then put the buoy to sleep using the dongle. If you notice anything strange in the data, such as missing data points, let us know so that we can check the settings and troubleshoot. Also make sure that the buoy stays charged. It should be solar charging while you’re mapping, but we also need to make sure that it stays charged for the next round of mapping, so it’s good to leave it outside for a while on the day before.
- Coast – Make sure you respect the ecosystems you’re learning about. Avoid damaging anything that’s alive, including trees, coral, fish, etc. Give wildlife space, take only pictures and leave only footprints. Pack out any trash you might make and don’t feed the fish, birds, or crabs.
- Yourself – Don’t forget to bring water, food, sun protection, and a friend so you have a safe and fun current mapping experience!