We will be using Google Earth Pro as an easy way to use satellite data to compare beaches or reef islands over time without having to write any code or having any GIS experience.
Google Earth Pro Tutorial
Step 1. Download Google Earth Pro. You will need this version to get the highest quality images and compare them in time.
Step 2. Go to the beach you want to measure, you can do this by writing its name in the search bar or by navigating to it by clicking on the earth and zooming in.
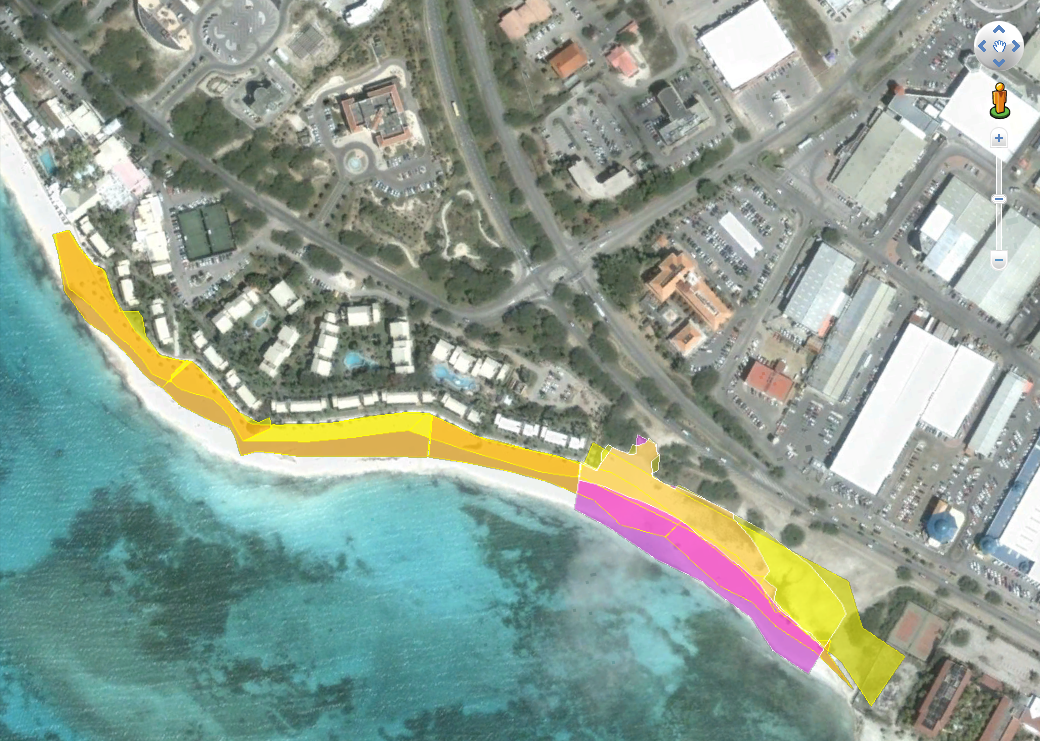
Step 3. Use the polygon tool, the third button in your toolbar, to trace the edges of the beach using white sand as a reference. Mark the border between land and water and white sand and other landscape. Do this in as much detail as possible by clicking along the edges. The dots can be adjusted later.
Step 4. When you clicked on polygon a window should have opened on your screen, in this window you can name the beach. Use the name of the beach and the year of the image you are looking at, the year is indicated on the bottom right corner of your map. In this window you can also change the color and transparency of the shape you are drawing.
Step 5. Look under the measurements tab in that window to see the area and perimeter in meters or other unit.
Step 6. Once you finish, press enter and the shape should appear on your left hand side under places. If you want to edit the file or check the measurements again you can right click on the image or file name and go to properties this will open the window and allow you to edit the polygon. (need footage)
Step 7. To go back in time press on the clock icon on the top toolbar. This will open a timeline showing all the dates for which there is satellite data available for this location. Go to the earliest clear image you can find, make sure it’s not to cloudy or pixelated. In our case this is 2002.
While drawing you might want to uncheck the previous polygon to make it invisible.
Step 8. Now repeat the previous steps drawing a polygon, to measure the size of the beach at this different point in time.
Now you are done! You can add these data points to an excel sheet to compare them over time. You can repeat this process for as many time points as you want.
Tip: Sometimes the image looks off. To make sure the measurements make sense find a reference object, a building or landmark that seems unchanged during the two time points. Measure it in both timelines to make sure it is the same size. If it is not try to find a different satellite image. Often the image isn’t perfectly centered that is ok for this purpose, as long as the size remains consistent.
Find more tips on using the polygon tool here: https://encounteredu.com/cpd/subject-updates/how-to-create-a-polygon-in-google-earth-pro
To look at more mapping methods using google earth engine NDWI, supervised classification and CoastSat check out our website science.brenchies.com